Animation Vinyl
|
For this internship I had the opportunity to work with Carlos Rodriguez and Gabe Erwin for the project called Animation Vinyl.
|

Full Design of the Vinyl
Project Summary
To create an animation sequence through vinyl, which will be placed on the animation windows. The location of the windows is inside the library for the animation room. What needs to be done is to gain permission to place vinyl on the windows of the animation room, measure the windows and determine the layout for the design, and create the design using previous students' work from the animation course. The purpose is make the windows inside the library more lively and represent the animation courses.
Role
Project Lead - Gabe Erwin
Vinyl Printer - Gabe Erwin
Researcher - Bruce Nghiem, Carlos Rodriguez, and Gabe Erwin
Artist for the birds - Carlos Rodriguez
Graphic Designers - Bruce Nghiem, Carlos Rodriguez, and Gabe Erwin
Vinyl Applier - Bruce Nghiem, Carlos Rodriguez, Gabe Erwin, and many more students in the internship course
Research Phase
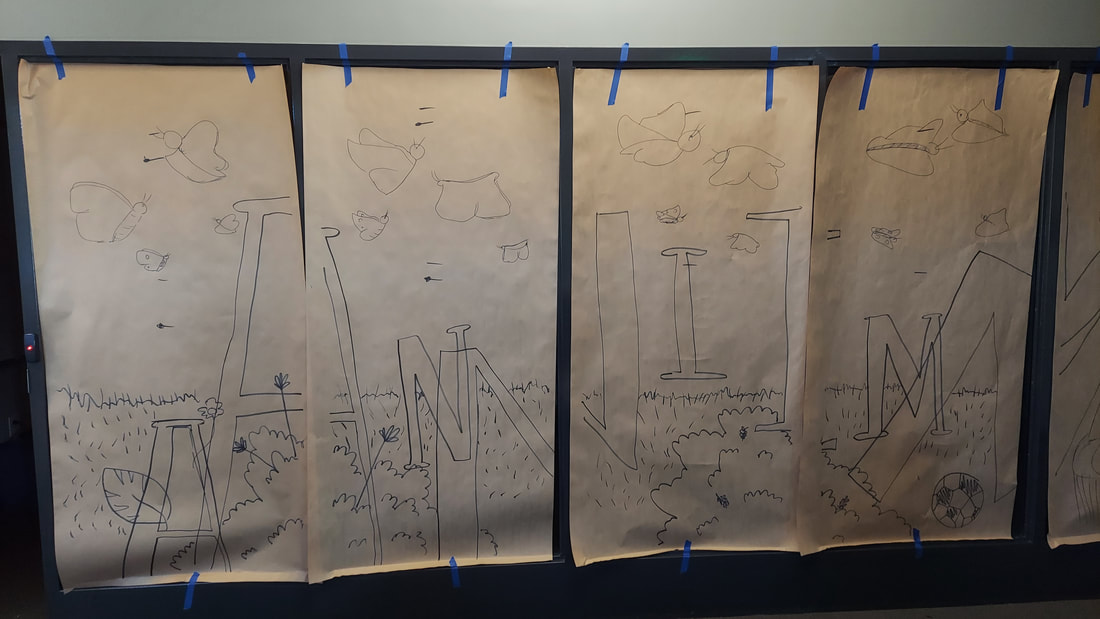
Our team look into the past works of the animation courses to find inspiration that could help determine what the design to be. Gain feedback and votes from the other interns to see what type of design would best fit the animation courses. We also checked out the location of where the project will take place to measure the dimensions.
- 72.5 inches height x 33.5 inches width per panel
- 3 inches between panel
- 252.5 inches Total width

Process
- Determine what for design/animation to use for the animation windows
- require many iterations of design to get approval to move forward with the project
- require many iterations of design to get approval to move forward with the project
- Measure the windows
- Test the layout through sketches
- Test the vinyl process
- Print the sets of vinyl
- Gain permission to place vinyl

Problem
Our team had some issues with the design because there were all sorts of demands made from professors which cause some confusion on how our team should move forward with the design choices.
The vinyl printers could not print to the dimensions that we needed.
Placing the vinyl was a challenge as in that there were lots of wrinkles and bubbles that needed to be removed. The vinyl project was on large-scale which made the logistics and alignment of the vinyl more of a challenge.
The vinyl printers could not print to the dimensions that we needed.
Placing the vinyl was a challenge as in that there were lots of wrinkles and bubbles that needed to be removed. The vinyl project was on large-scale which made the logistics and alignment of the vinyl more of a challenge.
Old Design Samples


Solution
The solution to the design concept was to make the whole design playful and have a sense of motion as a person walks past the 7 windows.
The vinyl printer was too small so our team prints the vinyl into sections for each window.
Work with a test print on how the panels will be place on the windows
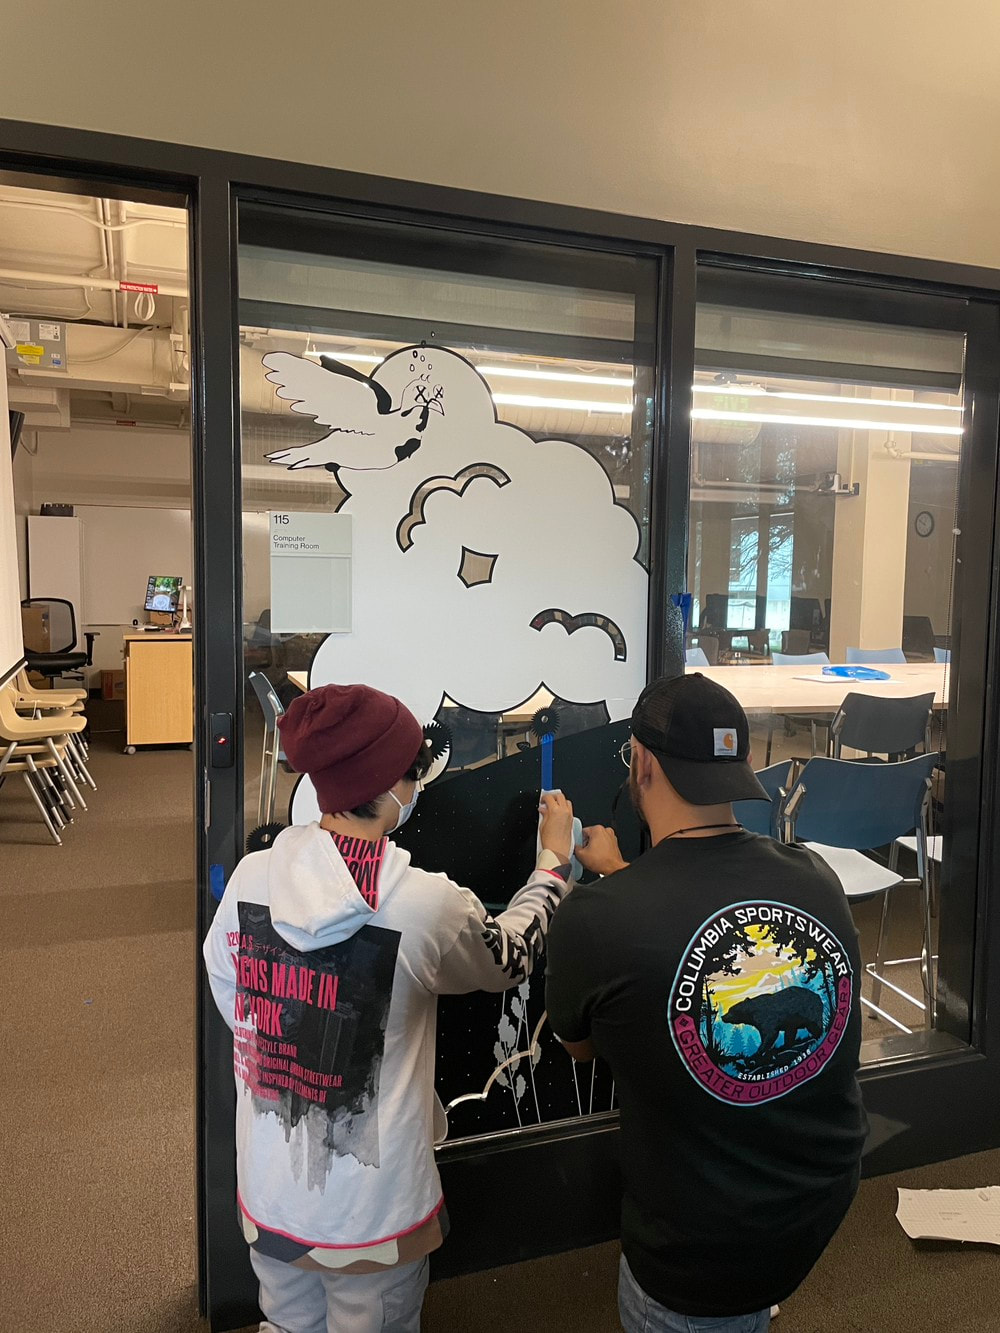
To avoid all the bubbles in the large vinyl sections, our team created a pattern where we use a hole puncher to have open areas where the bubbles can escape.
The vinyl printer was too small so our team prints the vinyl into sections for each window.
Work with a test print on how the panels will be place on the windows
To avoid all the bubbles in the large vinyl sections, our team created a pattern where we use a hole puncher to have open areas where the bubbles can escape.
Design
Each window is broken into sections that became the panels. Each panel is broken into layers based on color alignment and layout. In total there were approximately 84 panels to work with. There were 3 parts to the design which are the cloud-like font, the foreground and background, and lastly the birds. When it comes to layers we broke it down into 3 files for the print. These were the back layer as the white vinyl for the font and birds, the middle layer as the black vinyl for the hill and outline, and the front layer as the white vinyl for the foreground flowers.
Place the printed vinyl on transfer paper, trim the vinyl and transfer paper, and apply the vinyl to the windows
Place the printed vinyl on transfer paper, trim the vinyl and transfer paper, and apply the vinyl to the windows


Carlos' birds design

Deliverable

